In a nutshell
- 🔥 Pan-tilt method: Tilt and rotate a heated pan to spread a thin, continuous oil film, ensuring even coverage that prevents hot spots and stabilises temperature.
- 🌡️ Even oil = heat buffer: A uniform film dampens thermal gradients, supports steady Maillard reactions, reduces sticking, and avoids bitter scorch marks.
- 🧭 Technique: Preheat, add measured oil, tilt 30–45°, rotate to rim and back, aim for a mirror-like sheen; stop when no dull, dry patches remain.
- 🥄 Choices matter: Use higher smoke point oils (rapeseed, sunflower, refined peanut) and pans with flat, thick bases; seasoned carbon steel/cast iron spread oil best, stainless needs a touch more.
- 🥇 Real-world gains: More consistent browning, cleaner flavour, less oil waste, easier cleanup—control the film first, then the heat for reliable results.
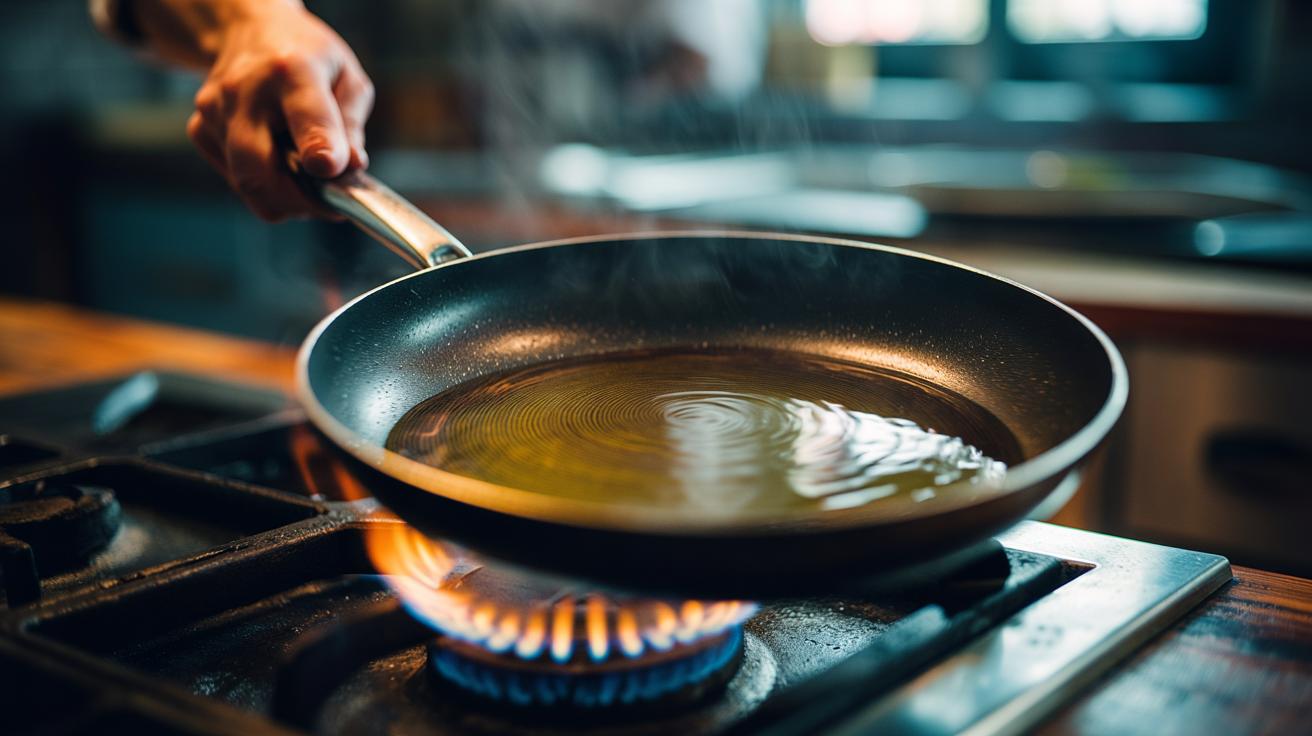
The pan-tilt method is a simple, professional trick that delivers consistent results on the hob. By tilting and rotating a heated pan to distribute a thin, continuous film of oil, you create even coverage that acts like a heat buffer between metal and food. It prevents patchy browning, smoking, and the dreaded hot spots that catch ingredients before they’re cooked. In home kitchens and commercial lines alike, this approach improves searing, keeps eggs from sticking, and extends the usable life of oil. A uniform oil film stabilises temperature across the cooking surface, ensuring predictable performance and cleaner flavour. For cooks seeking reliable colour and texture, mastering this motion is a small investment with big payoffs.
What the Pan-Tilt Method Is and Why It Works
The pan-tilt method involves warming your pan, adding a measured dose of oil, then tilting and rotating so gravity sheets the oil into a continuous film. Think of it as painting a surface: you’re aiming for a glossy, unbroken sheen rather than beads or bare patches. The process leverages surface tension and the pan’s curvature to carry oil to the rim and back to the centre, sealing microscopic pores and levelling the cooking field. Even oil coverage is the first defence against scorching and sticking.
This technique works because oil has relatively low thermal conductivity compared with metal, creating a controlled interface that moderates heat transfer. By achieving a consistent film thickness, you reduce localised spikes in temperature that cause uneven browning. On polished non-stick or seasoned carbon steel, oil flows swiftly; on rougher stainless, a slightly higher volume helps bridge texture. The aim is the same across materials: a continuous film that equalises contact and temperature, preparing the pan for reliable searing, sautéing, and shallow frying.
How Even Oil Coverage Prevents Hot Spots
Hot spots emerge where bare metal meets food while adjacent areas remain cushioned by oil. Those dry patches transmit heat faster, pushing sugars and proteins past ideal browning into bitter char. A uniform oil film acts as a heat buffer, smoothing the flow of energy from burner to ingredient and narrowing thermal gradients across the pan. When every millimetre of the base is lubricated, heat disperses more evenly and food colours at the same pace. The result is steadier Maillard reactions, juicier interiors, and less residue baked onto the pan.
| Problem | Effect on Food | Pan-Tilt Benefit |
|---|---|---|
| Dry patches | Scorching, sticking | Creates continuous film |
| Uneven film thickness | Striped browning | Levels oil distribution |
| Thermal spikes | Bitter notes, smoke | Dampens peak temperatures |
With even coverage, steam escapes uniformly and ingredients slide instead of tearing, so you flip cleanly and retain crust. The technique also reduces the temptation to flood the pan: a thin, well-spread layer prevents waste and smoke while improving clarity of flavour. Balanced oil means balanced heat, and that’s the foundation of consistent texture from centre to edge.
Step-by-Step Technique and Practical Tips
Preheat the pan until warm but not smoking; a droplet of water should sizzle softly, not explode. Add 1–2 teaspoons of oil for non-stick, 1–2 tablespoons for stainless or carbon steel. Lift the handle and tilt to about 30–45 degrees, rotating your wrist so oil runs to the rim and travels the circumference before gliding back to the centre. Aim for a continuous mirror-like sheen. If the film beads or breaks, add a few more drops and repeat. Stop when the base and corners are glossy with no dull, dry patches.
For large skillets, do two slow laps. On ridged or slightly concave bases, linger where oil retreats. If excess pools, return the pan level briefly over gentle heat so the film evens out. Use a folded heatproof towel to carefully wick surplus at the rim if shallow-frying. Keep heat moderate during this setup; it’s easier to raise temperature once the film is uniform. Control the film first, then control the heat—that order prevents early smoke and ensures a clean, even sear.
Choosing Oils, Pans, and Temperatures
Oil choice affects flow and resilience. Neutral, higher smoke point options such as UK-grown rapeseed (canola), sunflower, and refined peanut distribute smoothly and tolerate hotter pans. Light olive oil is versatile for mid-high heat; extra virgin suits gentler cooking where flavour matters. Viscosity rises as temperature drops, so a slightly warmer pan helps oils sheet without puddling. Pick an oil that matches both your heat level and desired flavour footprint.
Pan material matters. Cast iron and carbon steel hold heat well and, once seasoned, spread oil quickly; stainless needs a touch more oil to bridge microtexture; non-stick requires less oil but must not be overheated. Flat, thick bases—often found in tri-ply stainless or heavy aluminium—minimise thermal gradients. Start medium, then adjust: too hot and oil races to smoke; too cool and it beads. Watch the sheen: a steady, shimmering surface signals you’re ready to cook. When the oil looks even and alive, the pan is primed for uniform results.
Even oil coverage is not just cosmetic; it’s a practical route to steadier heat, cleaner flavours, and gentler clean-up. The pan-tilt method demands seconds of attention yet pays back with better browning and fewer surprises, whether you’re crisping skin-on fish or coaxing golden edges on courgettes. Control the film, tame the heat, and the food follows. As you refine the motion and match oils to pans, you’ll develop a feel for when the surface is truly ready. What dish will you try first to test the precision of an evenly oiled pan?
Did you like it?4.5/5 (21)