In a nutshell
- ♨️ A lukewarm soak uses mild heat (~35–45°C) to lower adhesive viscosity, safely loosening pressure‑sensitive adhesives without damaging surfaces.
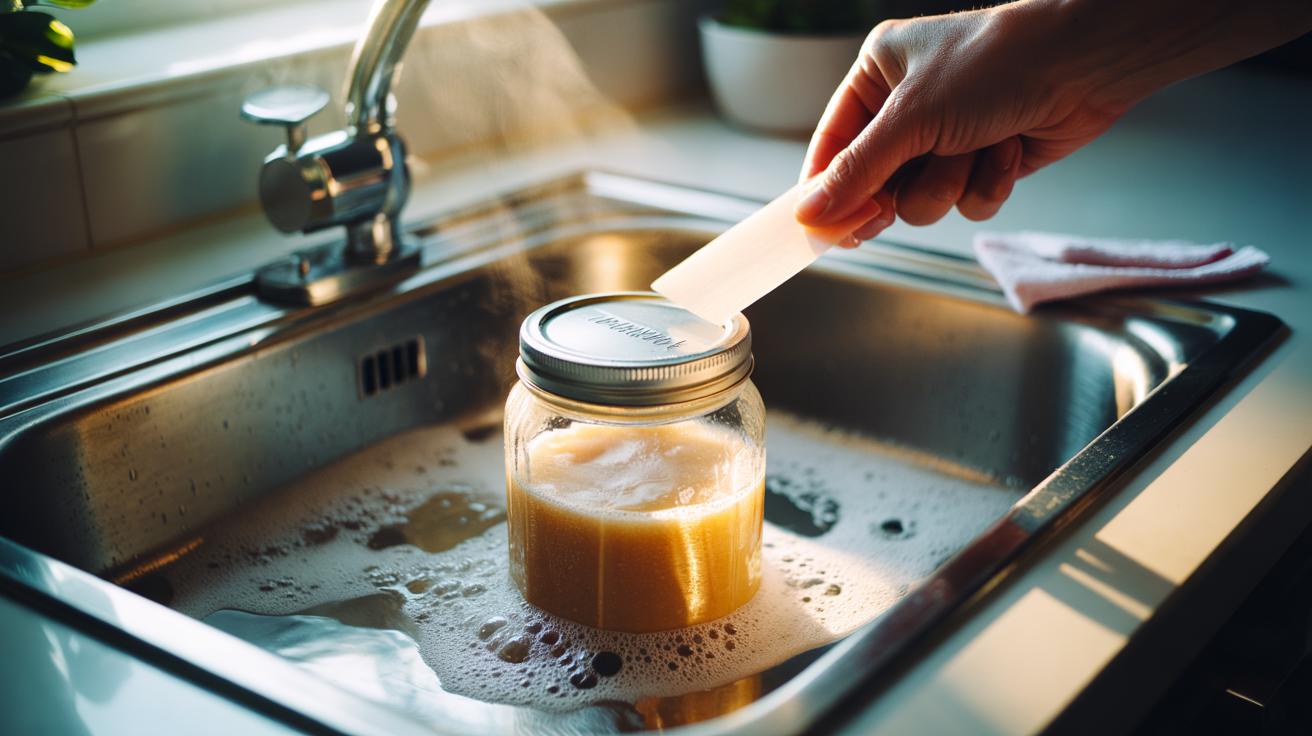
- 🧼 Step-by-step: warm water (~40°C) + a drop of washing-up liquid, soak or warm compress 10–20 minutes, peel slowly at a low angle, using a plastic scraper or card; finish with a microfibre cloth.
- 🛡️ Match method to material with safe temperature ranges—glass (35–50°C), plastics (30–45°C), finished wood (30–40°C compress), metal (35–55°C)—and always test inconspicuously.
- ♻️ Favour eco-friendly residue removal: a little vegetable oil or bicarbonate for abrasion; reserve isopropyl alcohol or citrus cleaner for glass/metal; avoid harsh solvents.
- 🔍 Guiding principle: prioritise temperature + time over aggressive scraping or chemicals to protect finishes, reduce fumes, and achieve a clean, label‑free surface.
Price labels welded to jam jars, barcodes glued to new gadgets, and stickers clinging to charity-shop finds: they all have one thing in common—an obstinate film of adhesive that resists the hasty tug. The quiet hero is a lukewarm soak, where mild heat loosens the bond without scalding your fingers or scarring the surface. By raising the temperature just enough to soften the sticky matrix, you can slide labels away cleanly and protect glass, metal, plastic, and wood finishes. Start gentle, stay patient, and let temperature do the heavy lifting—a small shift in degrees often delivers a big shift in stickiness.
Why Mild Heat Works on Adhesive Chemistry
Most household labels use pressure-sensitive adhesives made from polymers and tackifiers. These materials are engineered to be soft at room temperature, but not so fluid they drift. Warmth nudges the polymer blend toward a lower viscosity, easing its grip. At around 35–45°C, many PSAs pass their comfort zone and begin to relax, allowing capillary action and gentle pulling to do their work. Gentle warmth softens the bond instead of shocking the surface, which helps avoid whitening on plastics or micro-cracks in lacquered finishes.
Water is not just a carrier; it swells paper backings and infiltrates edges. A drop of washing-up liquid acts as a surfactant, helping water creep under the label and reducing surface tension. On glass and stainless steel, this combination is especially effective, while on coated wood a brief, controlled contact prevents swelling of the finish. The goal is not to melt glue entirely, but to lower its tack long enough for a slow, clean lift.
Step-by-Step: The Lukewarm Soak Method
Fill a bowl or sink with water at lukewarm temperature—aim for about 40°C, comfortably warm to the touch. Add a small squirt of washing-up liquid and stir. Submerge the labelled area if the item tolerates immersion; if it doesn’t, press on a soaked cloth or kitchen paper. Wait 10–20 minutes. Never jump straight to boiling water, which can warp plastics, cloud glass coatings, and set some glues harder.
Lift a corner gently with a thumbnail or a plastic card, keeping the label wet. Pull back slowly at a low angle while re-wetting the edge. For stubborn patches, alternate with a warm compress and mild mechanical action using a plastic scraper or old loyalty card. Residue can be dabbed with a little cooking oil or a drop of isopropyl alcohol on glass and metal. Rinse and dry thoroughly, then buff with a microfibre cloth to restore clarity.
Safe Temperatures and Surfaces at a Glance
Different surfaces tolerate heat and moisture differently, so match your soak to the material. If in doubt, start cooler and test in an inconspicuous area. The matrix below offers conservative ranges designed for home kitchens and typical consumer materials, minimising the risk of warping, clouding, or lifted finishes.
| Surface | Water Temp (°C) | Typical Soak Time | Notes |
|---|---|---|---|
| Glass (bottles, jars) | 35–50 | 10–25 min | Highly tolerant; use plastic scraper. |
| Plastics (PET, PP) | 30–45 | 10–20 min | Avoid near-boiling; test for haze risk. |
| Finished wood | 30–40 | 5–10 min (compress) | Use cloth compress; avoid soaking edges. |
| Metal (stainless, aluminium) | 35–55 | 10–25 min | Dry promptly to deter water spots. |
If labels sit on textured plastics or powder-coated metal, extend the compress rather than immersing. For security foils and tamper-evident labels, expect partial breakup; switch to repeated warm compresses and light oil to roll away residue. Avoid sharp blades, which can gouge and create future dirt traps. Mild heat remains your safest lever; patience does the rest.
Eco-Friendly Clean-Up and Residue Removal
Once the label lifts, tackle the smear. Start with vegetable oil or olive oil: massage a drop into the residue and wipe with a microfibre cloth. A pinch of bicarbonate of soda can add gentle abrasion without scratching glass. For heavy patches on metal or glass, a small amount of isopropyl alcohol or a citrus d‑limonene cleaner works quickly. Avoid harsh solvents unless absolutely necessary, as they can dull plastics and off-gas indoors.
Keep tools kind: plastic cards beat metal blades, and soft cloths beat scouring pads. Dispose of label scraps and oily tissues in household waste to keep drains clear. Choose fragrance-light products and ventilate when using alcohol or citrus cleaners. The greener rule of thumb is simple: temperature + time before chemistry. Use the mildest method that succeeds, and you’ll protect both your surfaces and your air.
The beauty of the lukewarm soak is its simplicity: modest heat, a dash of surfactant, and a little patience undo a glue engineer’s best intentions. Controlled warmth softens adhesive without stress or scars, leaving glass bright, plastics intact, and wood finishes serene. Armed with a bowl, cloth, and plastic card, you can outwit stickers from shop labels to stubborn barcodes while cutting down on solvents and scraping. Where will you put this gentle method to work first—your pantry jars, your workshop tins, or a freshly thrifted treasure waiting for its clean slate?
Did you like it?4.4/5 (23)