In a nutshell
- 🗂️ Transform cereal boxes into custom-fit dividers that maximise every centimetre and deliver instant organisation.
- ✂️ Simple steps: measure drawer height minus 0.5 cm, cut and laminate strips, slot to form a stable grid, test-fit and trim.
- 🧭 Plan layouts by use: kitchen, bedroom, office, bathroom—place most-used items near the handle and keep a flexible “guest” bay.
- 🌱 Benefits: zero-cost, low-waste, quiet, and customisable; cardboard friction curbs sliding better than hard plastic trays.
- 🧼 Care and durability: seal edges, add film for damp areas, double thickness for heavy loads; the system is modular and easy to refresh.
There’s a small domestic magic trick hiding in your recycling bin: the humble cereal-box divider. Cut, folded, and slotted into place, simple cardboard brings instant organisation to chaotic drawers, from kitchen utensils to makeup and stationery. It’s quiet, adaptable, and costs nothing beyond a moment’s care. Instead of buying plastic inserts of the wrong size, you fashion dividers that fit your drawer precisely. The result is a tailored system that guides daily habits: items go back where they belong, and clutter stops spreading. For renters and homeowners alike, this is a tidy, sustainable fix that looks neat, works hard, and can be refreshed as tastes or needs change.
Why Cardboard Beats Costly Organisers
Purpose-made drawer trays look slick, but they often waste space and demand a uniform layout that life rarely obeys. A cereal-box divider gives a custom-fit solution that hugs the internal dimensions of your drawer, making use of every centimetre. Cardboard is light yet surprisingly rigid when doubled, so it forms stable channels for anything from wooden spoons to USB sticks. You already own the raw material, which makes the upgrade essentially zero-cost and genuinely low-waste. It’s also quiet in use: the slight friction of cardboard stops items skidding, and it won’t rattle against timber like hard plastic.
There’s a design dividend, too. You can set the partition width to match your belongings, then adjust as routines evolve. If a tool family grows, add a new lane; if it shrinks, remove one. The aesthetic can be understated (plain kraft), cheerful (wrapping paper offcuts), or wipeable (contact film). In a small flat or a family home, this nimble approach turns drawers into calm, legible spaces.
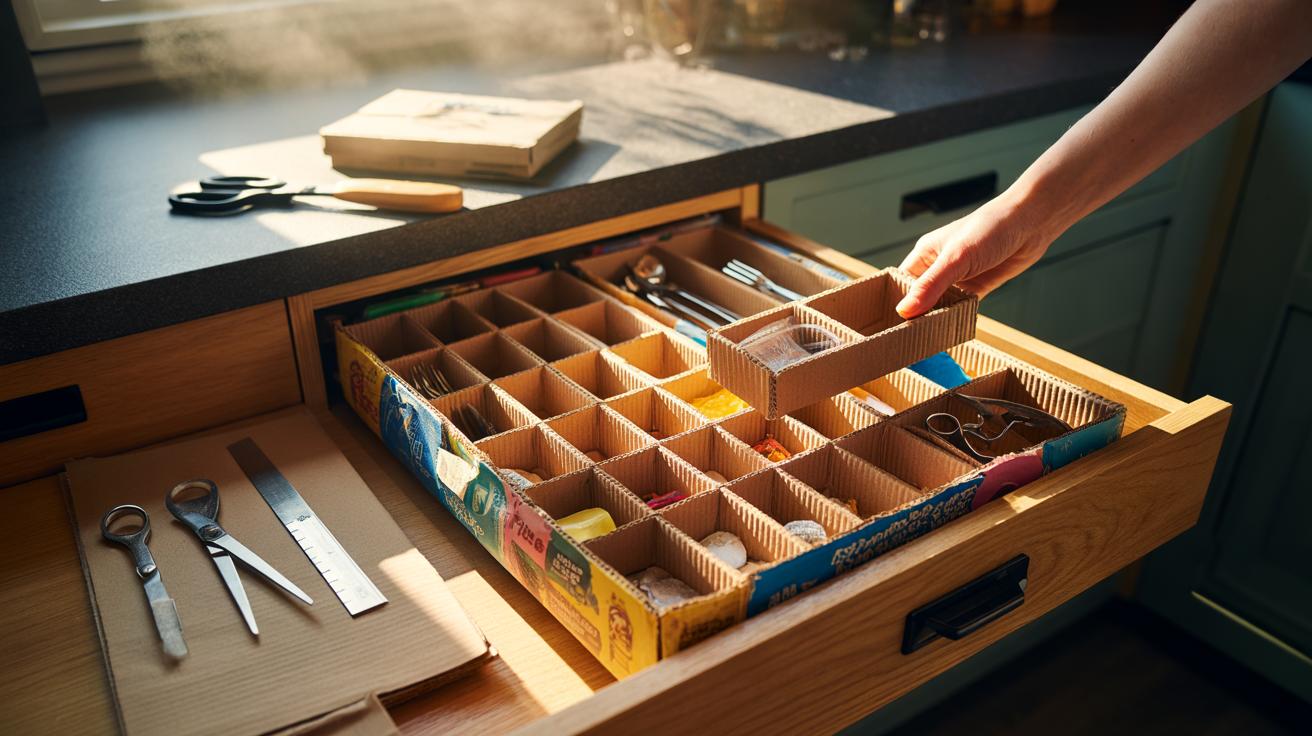
How to Turn a Cereal Box into Dividers
Start by emptying and flattening a clean cereal box. Measure the internal drawer height and subtract 0.5 cm so the divider doesn’t snag the runners. Cut strips to that height with a sharp craft knife and a metal ruler for accuracy. For firmer walls, laminate two strips with PVA or double-sided tape and press under a heavy book while they set. Score gently along any planned fold lines so bends are crisp, not crushed.
Create the grid. Cut slots halfway down the height of some strips at measured intervals, then interlock them with matching slots on the cross-strips. This produces a stable lattice without glue, ideal when you expect to reconfigure later. For a simple front-to-back array, use full-length rails and insert shorter crosspieces where needed. Test-fit as you go, trimming millimetres to ensure a snug, rattle-free finish. If you prefer a polished look, wrap the visible edges in paper or self-adhesive film, and burnish corners so they don’t catch fabric.
Smart Layouts for Different Drawers
Begin with what the drawer has to hold, not with a fixed pattern. In a cutlery or utensil drawer, dedicate a long lane to spatulas and tongs, shorter bays to peelers and thermometers. For a bedroom drawer, map the “daily grab” items front and centre: socks, watches, hair ties. In a workspace, group by task—charging kit, notetaking, cables—and give each its own home zone. Placing the most-used sections near the handle cuts rummage time every single day. The aim is to remove decisions: when every object has a shaped berth, tidying becomes automatic.
| Drawer Type | Suggested Box Height | Best For | Tip |
|---|---|---|---|
| Kitchen Utensils | 6–7 cm | Spatulas, ladles, peelers | Run long lanes front to back for easy reach. |
| Bedroom | 8–10 cm | Socks, belts, jewellery trays | Use narrow cells to keep pairs together. |
| Office | 5–6 cm | Cables, pens, sticky notes | Label the rims for quick resets. |
| Bathroom | 5 cm | Makeup, razors, cotton buds | Line with contact film to resist splashes. |
Keep lanes slightly wider than the bulkiest item so nothing jams. Reserve one flexible bay—the “guest slot”—for new arrivals. A clear map on the inside of the drawer front helps children return things to the right place and protects your new system from entropy.
Finishing Touches and Maintenance
Edge durability matters. Seal cut edges with a strip of tape or a coat of clear-drying glue; this hardens fibres and prevents fuzz catching on socks or sleeves. If a drawer faces moisture—bathroom, under-sink—wrap the dividers in self-adhesive film or leftover wallpaper and fold neatly around corners. Replace any section that softens, warps, or stains; the swap takes minutes and costs nothing. Where loads are heavy (tools, metal gadgets), double the cardboard thickness or add a thin backing of corrugated from a delivery box.
Maintenance is light-touch. Vacuum crumbs with a brush attachment, then wipe with a barely damp cloth if you’ve sealed the surface. Seasonal reshuffles work well: remeasure after a kitchen clear-out, or widen a bay when school supplies arrive. The beauty of this modular approach is its reversibility—no screws, no residue, no sunk cost. You tweak, you live with it, you tweak again, and the drawer evolves with your routine.
What begins as packaging becomes a quiet upgrade to daily life: instant organisation that looks considered and feels calm. With a few measured cuts and an eye for the objects you actually use, a cereal-box divider creates order that lasts, while keeping plastic out of the equation. It’s practical, frugal, and pleasingly circular. The next time you flatten a box for recycling, pause: could it be the missing piece in your muddled drawer? And if one drawer can change this quickly, which corner of your home is ready for the same cardboard-powered clarity next?
Did you like it?4.5/5 (24)