In a nutshell
- 🌱 Uses bottom watering and capillary action to deliver even moisture, prevent droop, and keep roots oxygenated for steadier growth.
- 🛠 Build it right: a slightly wider bowl, 1–2 cm reservoir, spacers, and a controllable wick; consider porous ceramic, use room‑temperature water, and plan a monthly flush.
- ✅ Clear benefits with caveats: rehydrates hydrophobic compost, reduces fungus gnats and leaf splash; watch for salt build-up and avoid over-wetting xeric plants.
- 📏 Step-by-step: pre-soak dry mix, thread wick, set spacers, mark a fill line, let it drink for 3–6 hours, then calibrate by adjusting wick length and refill only when nearly empty.
- 🌿 Real-world results: perkier leaves, predictable intervals, and resilience; a hybrid approach—bottom watering plus periodic top flush—keeps nutrients balanced and roots healthy.
Watering is where many indoor gardeners come undone. Leaves droop not only from thirst but from boom-and-bust drenching that leaves roots gasping. A practical remedy is quietly gaining ground in British homes: the slow-watering bowl, a shallow reservoir that feeds the pot from below through capillary pull. By encouraging bottom watering, it promotes even moisture throughout the root zone, sidestepping crusted, hydrophobic compost and soggy crowns. Consistent, gentle hydration stabilises turgor and prevents the tell-tale midday slump. It is an elegantly simple idea: give the substrate access to water and let physics, not guesswork, decide the pace. Once dialled in, it can turn temperamental houseplants into steady performers.
How Bottom-Up Hydration Works
The science is straightforward. A slow-watering bowl provides a small, accessible pool under a pot with drainage holes. Through capillary action, water moves upward only as the substrate demands it, following gradients in matric potential. This creates a moisture profile that is uniform across the root zone, not just wet at the top and dry at the core. Because water rises slowly, the mix retains air-filled pores, preserving oxygen around roots and avoiding the suffocation that triggers collapse. The result is steadier growth and fewer dramatic swings in leaf firmness.
Bottom-up hydration also solves a common indoor problem: hydrophobic compost that shrugs off top watering. Instead of beading and running down the sides, moisture re-enters from beneath, rewetting peat-based or coco-heavy mixes evenly. It curbs splash on foliage (useful for African violets), and it discourages fungus gnats that thrive in repeatedly soaked top layers. Evenly moist, aerated roots are far less prone to both drought stress and rot.
Designing a Slow-Watering Bowl That Actually Works
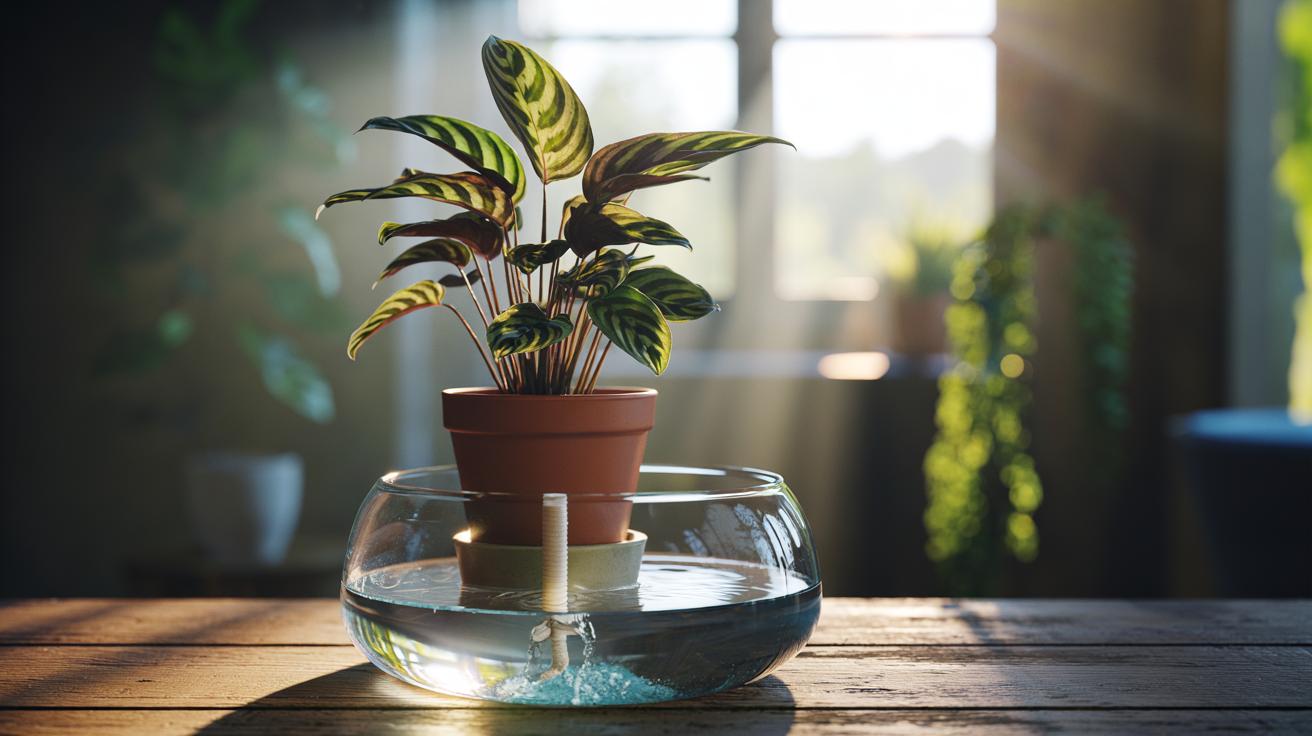
Start with a bowl or saucer 2–3 cm wider than your pot. Add a spacer layer—LECA, ceramic feet, or a slotted grid—so the pot base touches water via a wick, not by sitting in a bath. Aim for a reservoir depth of 1–2 cm. A cotton or nylon wick threaded through a drainage hole gives finer control; move its tail deeper or shallower to adjust flow. Terracotta or porous ceramic inserts help buffer moisture, while glazed bowls simplify cleaning. Never let the pot sit drowned; it should sip.
Use room-temperature water. If feeding, dilute fertiliser to half strength and alternate with plain water. Refill only when the reservoir is nearly empty to maintain oxygen exchange. Once a month, top-water thoroughly to flush salts. Rinse the bowl weekly to avoid biofilm, and inspect roots each repot for white, well-branched growth. A steady trickle beats a periodic deluge for resilience and leaf posture.
Benefits, Drawbacks, and Best Uses
The immediate gain is even moisture, which prevents sudden turgor loss—the classic droop from dry pockets—and the anoxic spells that follow heavy drenching. Leaves stay perky, new growth unfurls without creasing, and watering frequency becomes predictable. Bottom watering also keeps crowns dry, reducing bacterial spots on fuzzed leaves, and it deprives fungus gnat larvae of their favourite surface sog. Drawbacks? Salts can accumulate if you never perform a flushing top-water, and truly xeric plants risk staying too damp unless you throttle the wick. Plan a monthly flush to reset the substrate and keep nutrients in balance.
| Method | Moisture Distribution | Risks | Ideal Scenarios |
|---|---|---|---|
| Top Watering | Wet surface, dry core common | Channeling, leaf splash, gnat-prone | Occasional flushes, fast-draining mixes |
| Bottom Watering (Slow Bowl) | Uniform, capillary-driven | Salt build-up without flushes | African violets, calatheas, peperomias |
| Hybrid Approach | Even moisture plus periodic reset | Slightly more effort | Most foliage plants in peat/coco mixes |
For cacti and succulents, shorten exposure by limiting the wick and letting the bowl dry completely between refills. For thirstier tropicals, widen the wick tail or increase reservoir depth modestly. Watch pot weight: a consistent heft after watering signals a reliable moisture baseline.
Step-by-Step: Using a Slow-Watering Bowl at Home
Before you begin, pre-soak very dry or hydrophobic compost in a sink to reset capillarity. Thread a wick through a drainage hole and leave 3–5 cm in contact with reservoir water. Place spacers in the bowl, set the pot on top, and add water to just cover the wick tail. Mark the ideal fill line with tape for consistency. Let the plant drink for three to six hours, then reassess rather than leaving it perpetually topped up during the first week.
Calibrate by touch and weight. If the top third stays dusty days after filling, lengthen the wick or add a second tail. If the mix feels clammy for a week, shorten the wick or raise the pot higher. Refill when the bowl is nearly empty, not before. In winter, reduce exposure time as growth slows; in summer, extend or widen the wick. Every four to six weeks, top-water until you see runoff to prevent salt build-up and keep nutrients mobile.
The slow-watering bowl turns watering from a guessing game into a controlled, plant-led process. By harnessing capillary action and respecting oxygen as much as water, it delivers the steady hydration that keeps leaves lifted and colour true. You gain longer intervals between care without courting drought, and you avoid the panic cycles that invite root rot. Even moisture is the quiet foundation of healthy, resilient houseplants. Which of your plants would benefit most from a gentler, bottom-up routine, and how might you adapt a bowl, wick, and schedule to suit its particular thirst and season?
Did you like it?4.4/5 (29)