In a nutshell
- 🔥 Hot pan, cold oil: preheat the pan, add cool oil until it shimmers, then add dried food for a clean release and a crisp crust.
- 🧪 The science: metal thermal expansion smooths micro-roughness, a rapid viscosity drop forms an oil film, and brief steam lift delays sticking while Maillard builds flavour.
- 🥘 Key steps: water-bead test, add cold oil, dry the food, lay it away from you, then don’t move it for 60–90 seconds; adjust heat and avoid overcrowding.
- 🛢️ Pans and oils: stainless steel, carbon steel, and cast iron shine; choose high-smoke-point oils (rapeseed, groundnut, avocado, ghee); use gentler heat with non-stick.
- ⚠️ Pitfalls and safety: wet surfaces, low heat, and impatience cause sticking; watch for shimmer not smoke, manage splashes, deglaze to prevent residue, and protect non-stick coatings.
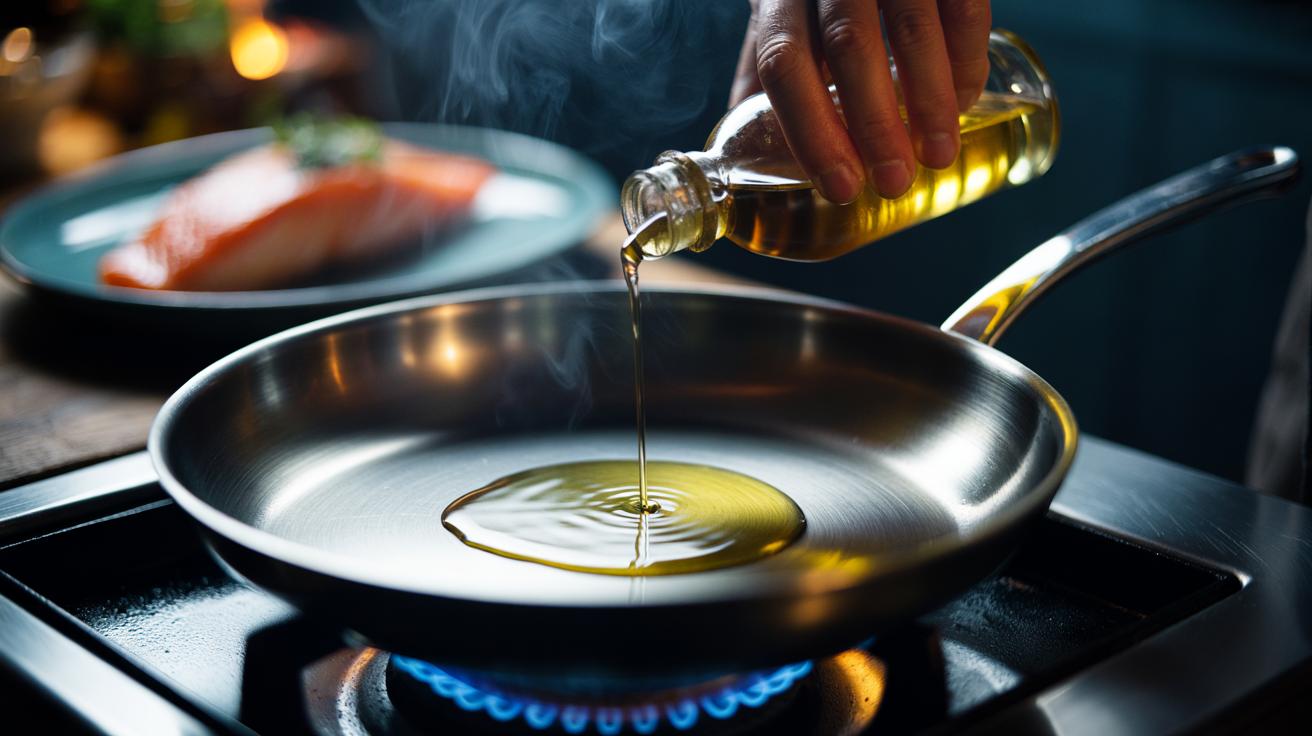
Every cook has faced the heartbreak of a beautiful fillet welded to the pan. The fix is refreshingly simple: the hot pan, cold oil technique. Bring the pan properly up to temperature, then add cool oil and introduce the food once the oil thins and shimmers. This approach harnesses physics—thermal expansion, viscosity shifts, and controlled steam—to create a temporary, reliable non-stick surface without special coatings. The result is cleaner release, a better crust, and less waste. Below, we explain the mechanics behind the method, the steps that make it foolproof, and the best combinations of pans and oils for everyday UK kitchens, from stainless steel to carbon steel.
How Temperature Change Creates Non-Stick
When metal heats, it expands, subtly smoothing microscopic peaks and valleys in the pan. Those ridges are where protein chains in food can snag and burn. Preheating enlarges the pan’s surface very slightly and lowers its surface energy, so food is less inclined to bond. Adding cold oil to a hot pan triggers a rapid viscosity drop: the oil becomes fluid, racing into microscopic pores and forming a thin, continuous film. That film is the key barrier between food proteins and bare metal, reducing adhesion long enough for browning to lock in a crust.
There’s another helper: water at the food’s surface. If the pan is in the right temperature window, surface moisture flashes to steam, briefly “floating” the food and delaying direct contact until proteins set. Too cool and proteins latch; too hot and you scorch before the crust forms. Aim for a controlled sizzle, not a raging roar. The sweet spot is where oil shimmers, not smokes, allowing rapid sear and clean release.
The Science in Your Skillet: Expansion, Steam, and Proteins
Proteins such as albumin in fish or myosin in meat are quick to denature and coagulate when they meet heat. If they encounter raw metal first, they anchor; if they meet a well-formed oil film at the correct temperature, they set against the film and release naturally once a crust develops. Meanwhile, sugars and amino acids drive the Maillard reaction, building flavour and colour. Non-stick isn’t magic—it’s the timing of protein setting against a lubricated, hot surface.
Thermal gradients also help. Fresh, cooler oil entering a very hot pan creates tiny currents that sweep debris away and keep the film continuous. On stainless steel, a visible “shimmer” indicates the pan is ready; on cast iron and carbon steel, subtle smoke wisps from high-smoke-point oils signal go-time. Avoid the extreme “Leidenfrost” dance with water drops: it’s a sign the pan is overly hot for delicate proteins. Think controlled energy, not maximum heat.
Practical Steps: From Water Test to Perfect Sear
Preheat a dry stainless-steel pan over medium-high for 2–3 minutes. Perform a quick water test: flick in a few drops. If they bead and glide like quicksilver, the surface is primed. Wipe away the water, then add 1–2 teaspoons of cold oil and swirl. The oil should thin and shimmer instantly. Lay in thoroughly dried food—moisture is the enemy of sear—placing pieces away from you to prevent splashes. Resist moving the food for the first 60–90 seconds; it will release naturally as a crust forms.
Control the heat after the initial sear. Reduce slightly to finish cooking without burning fond. Don’t overcrowd: crowding cools the pan and collapses the protective film, causing sticking. Use a flat, thin-edged metal spatula with stainless and carbon steel to slide under the crust. If the item clings, wait another 20–30 seconds. Patience often beats force when it comes to release.
| Pan Type | Readiness Cue | Suggested Oils | Notes |
|---|---|---|---|
| Stainless Steel | Water beads/skitters; oil shimmers | Rapeseed, groundnut, sunflower | Add oil to hot pan, not before |
| Carbon Steel | Light smoke from oil | Rapeseed, beef dripping, ghee | Helps build seasoning |
| Cast Iron | Even heat, faint smoke | Grapeseed, lard, ghee | Excellent heat retention |
| Non-Stick | Mild preheat only | Any light oil | Keep below high heat to protect coating |
Choosing Pans and Oils: What Works, What to Avoid
Stainless steel rewards this technique with crisp, even sears. Carbon steel and cast iron excel with fattier proteins and high-heat applications, their mass giving stable temperatures that maintain the oil film. Non-stick pans need gentler heat; the method still aids browning but don’t chase a restaurant-level crust. Avoid preheating oil in stainless for prolonged periods, as it can polymerise patchily and increase sticking later.
Pick oils with high smoke points for searing—rapeseed (canola), groundnut (peanut), avocado, or clarified butter. Use butter for finishing flavour once the crust is set. Keep the hob ventilated and stop before visible smoking becomes heavy; burnt oil leaves gummy residues that promote sticking. Dry brining and light dusting with flour or starch can aid browning for delicate fish, but shake off excess. Dry food, right heat, and the briefest touch of oil: that’s the trifecta.
Common Pitfalls and Safety Notes
Three errors cause most sticking: wet surfaces, low heat, and impatience. Pat foods dry with kitchen paper; excess surface water cools the pan and breaks the oil barrier. Heat until the right cue appears, not just a timer. Then give proteins a moment to set before you nudge. If food grips, it’s signalling “not yet”. Overcrowding is another culprit—work in batches so each piece enjoys steady heat and a stable film.
Safety matters. Keep handles turned in, and lay food away from you to avoid splashes when adding cold oil to a hot surface. Do not overheat non-stick coatings; medium to medium-high is plenty. If oil smokes aggressively, reduce heat and ventilate. Deglaze stuck-on bits with a splash of water, wine, or stock while the pan is still warm; it prevents build-up that sabotages the next session. Clean, dry, heat, oil, then cook: repeatable habits make effortless release.
Mastering the hot pan, cold oil sequence turns everyday pans into dependable performers. The physics are simple: warm the metal so it expands and lowers adhesion, introduce cool oil to form a thin film, and let proteins set before you touch them. With the right oil and a steady hand, you’ll enjoy clean release and a proud, flavour-rich crust on everything from salmon to halloumi. What dish will you reclaim first with this temperature-savvy technique, and how will you tweak the timing to suit your own hob and pans?
Did you like it?4.5/5 (28)