In a nutshell
- 🍳 The cold oil, hot pan temperature flip creates a quasi non-stick surface by boosting wettability, flashing off moisture, and delaying protein bonding—think steam + oil = release.
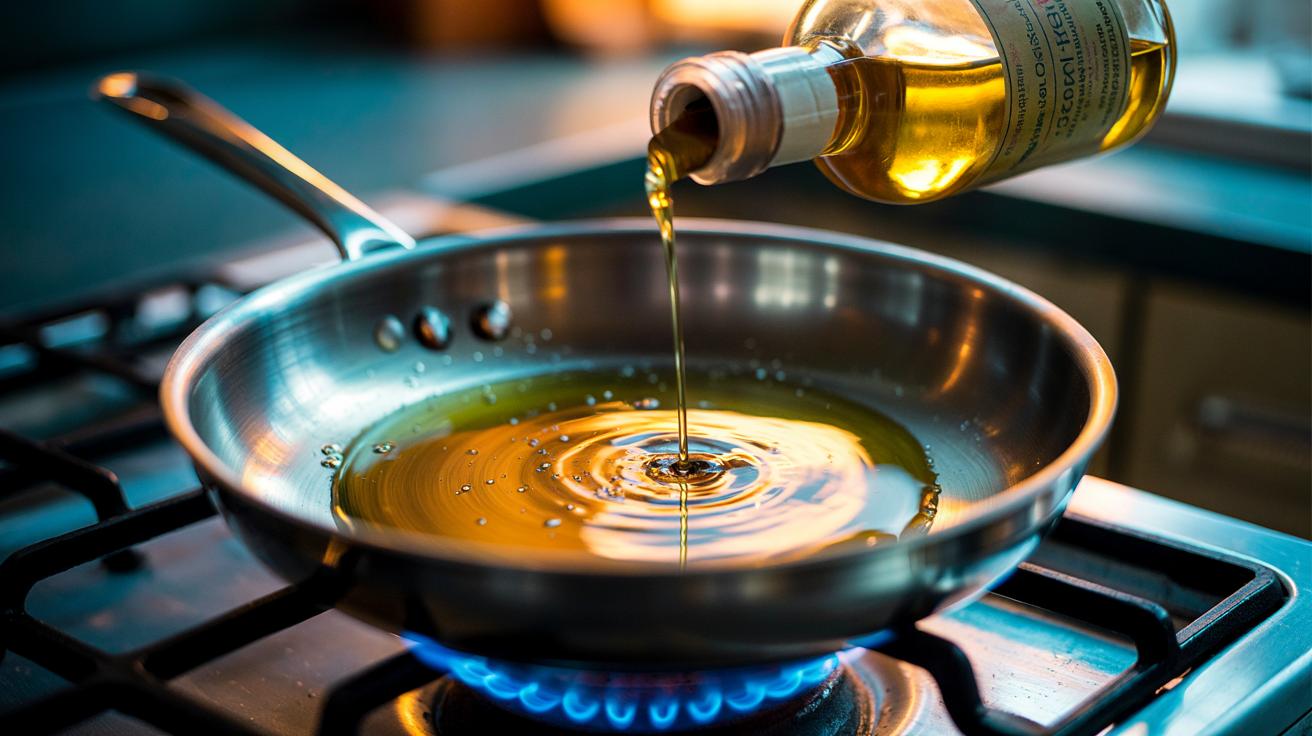
- 🔥 Method: preheat until a droplet dances, add room‑temperature oil to a shimmer, then add food and wait for natural release before flipping; wok variant: heat, oil, swirl, pour out, add fresh oil.
- ❌ Common mistakes: underheating, too little oil, panic-stirring, and overshooting smoke point; ✅ Fixes: even preheat, a continuous oil film, patience, and quick heat adjustments or deglazing.
- 🧪 Materials and oils: stainless steel for crisp browning, cast iron for heat retention, carbon steel once seasoned; choose oils by smoke point (rapeseed, peanut, sunflower for high heat; EV olive or ghee for moderate).
- 🥇 Payoffs: clean release, deeper Maillard browning, fewer stuck-on bits, and easier cleanup—making even stainless behave like a non-stick surface with no coatings.
Every cook has wrestled with a stubborn fillet or a fragile fried egg that welds itself to a pan. There is, however, an elegant fix borrowed from Chinese kitchens and embraced by chefs worldwide: cold oil, hot pan. Heat the pan first, add room-temperature oil second, and the food releases as though the surface were coated. This is not magic; it is physics and good practice. By controlling temperature, you control adhesion, steam formation, and the pan’s microscopic texture. Hot pan first, cold oil second: that sequence is the secret. Done correctly, you achieve a clean sear, richer browning, and fewer tears at the hob.
Why Heat and Temperature Gradients Matter
Sticking is mostly about protein bonding and moisture. When a pan is too cool, wet surfaces linger, proteins unfold, and they cling to the metal’s micro-roughness before a crust can form. But a properly heated surface evaporates surface moisture quickly, creating a fleeting layer of vapour between food and steel. As metals heat, they also expand, subtly smoothing microscopic peaks that snag delicate foods. Add oil once the pan is hot and it instantly thins, spreading into crevices to create a uniform film.
The “temperature flip” prevents premature sticking because the oil hits a hot surface, not the other way round. The oil’s lower viscosity at heat improves wettability, while the food’s cooler surface chills the contact point just enough to slow protein bonding until browning begins. The result is a stable interface: steam + oil = release. This is why stainless steel suddenly behaves like a non-stick surface when treated with heat discipline.
How to Execute the Cold-Oil, Hot-Pan Method
Heat the empty pan over medium to medium-high until it is evenly hot—two to three minutes for stainless steel, longer for cast iron. Test with a droplet of water: it should dance and glide, not sit and simmer. Now add room-temperature oil and swirl immediately. The oil should shimmer in seconds. Only when the oil shimmers do you add the food.
Lay food down gently, letting it make full contact. Resist moving it. Proteins will initially stick, then naturally release as a crust forms; that is your cue to flip. For eggs or delicate fish, reduce the heat slightly after the oil shimmers, keeping the interface hot but controlled.
For woks, there’s a classic variation: briefly heat to smoking, add a film of cold oil, swirl to coat, pour it out, then add fresh oil to cook. This seals micro-pores, creating a temporary non-stick layer without chemical coatings.
Common Mistakes and How to Fix Them
If your food still sticks, you likely rushed the preheat. A pan that is merely warm will let moisture pool and proteins latch on. Slow down: give the metal time to heat evenly, especially with thick-gauge stainless or cast iron. Even heat equals even release. Also, use enough oil to form a continuous film; a stingy drizzle leaves dry patches that act like glue.
Another pitfall is panic-stirring. Food needs a moment to sear and build a crust. If it resists when nudged, leave it; try again 30–60 seconds later. For eggs, ensure the oil fully coats the base and adjust the heat down just before they go in. If oil smokes aggressively, you overshot; remove the pan from the hob for a moment and start again.
Lastly, match technique to the material. Non-stick pans don’t need intense heat; stainless and cast iron do. De-glaze stuck fond with a splash of water or wine—good flavour, zero scrubbing.
Science at the Hob: Materials, Oils, and Smoke Points
Metal choice shapes results. Stainless steel delivers crisp browning when well heated; cast iron stores heat and excels at steaks; carbon steel behaves like a seasoned hybrid once patinated. All benefit from the cold-oil, hot-pan approach because it optimises the interface where sticking begins. The other half of the equation is the oil. Pick an oil with a suitable smoke point for your task and flavour goals.
Use neutral, higher-smoke-point oils for hard sears, and aromatic, lower-smoke oils for gentler cooking. Keep oils at room temperature so they thin rapidly on contact, spreading into a resilient film. Below is a quick reference for everyday choices and how they pair with the technique.
| Oil | Approx. Smoke Point (°C) | Flavour/Use | Notes for Cold-Oil, Hot-Pan |
|---|---|---|---|
| Refined Rapeseed (Canola) | 205–230 | Neutral, versatile | Excellent for searing; spreads fast and clean |
| Groundnut (Peanut) | 225–235 | Light, nutty | Great for woks and high heat |
| Sunflower (Refined) | 225–235 | Neutral | Reliable for stainless steel sautés |
| Extra-Virgin Olive Oil | 165–190 | Distinct flavour | Use for medium heat or finish after searing |
| Ghee/Clarified Butter | 200–250 | Buttery, clean | Ideal for eggs, fish, and aromatics |
The cold-oil, hot-pan trick succeeds because it aligns physics with flavour: a hot surface evaporates moisture, a thin oil film equalises contact, and food releases when the crust is ready. Treat the pan like an instrument—preheat until responsive, add cold oil to create the slip layer, then let time and temperature do the rest. Master the sequence and even stainless steel behaves. What will you test first: a golden skinned sea bass, a lacy-edged fried egg, or that elusive, glassy-crusted tofu—and how will you tune heat and oil to make it sing?
Did you like it?4.6/5 (22)