In a nutshell
- 🧪 How it works: DHA binds the stratum corneum; sugar buffs tinted cells while olive oil softens and loosens them, lifting colour without stripping the skin barrier.
- 🧴 Method: Warm shower, apply oil for 2–3 minutes, then a paste at 2 parts sugar : 1 part olive oil; use light circular motions for 60–90 seconds per area, rinse with gentle cleanser, and follow with a glycerin/urea moisturiser.
- ⚠️ Safety: Avoid use on broken or sunburnt skin; acne‑prone types can swap olive oil for jojoba or grapeseed; prefer brown sugar for face; separate from AHA/BHA or retinoids by 24 hours and mind slippery surfaces.
- 🔄 Comparisons: Store-bought removers use AHAs/enzymes/urea for speed; the pantry method is low-cost and fragrance‑free but technique‑dependent; alternating methods can clear heavy build‑up.
- 📋 Pro tips: Oil first, then gentle abrasion; use a non‑slip mat; an exfoliating mitt can help with light strokes; older tans may need two sessions; track ratio, grain, and timing for consistently even fades.
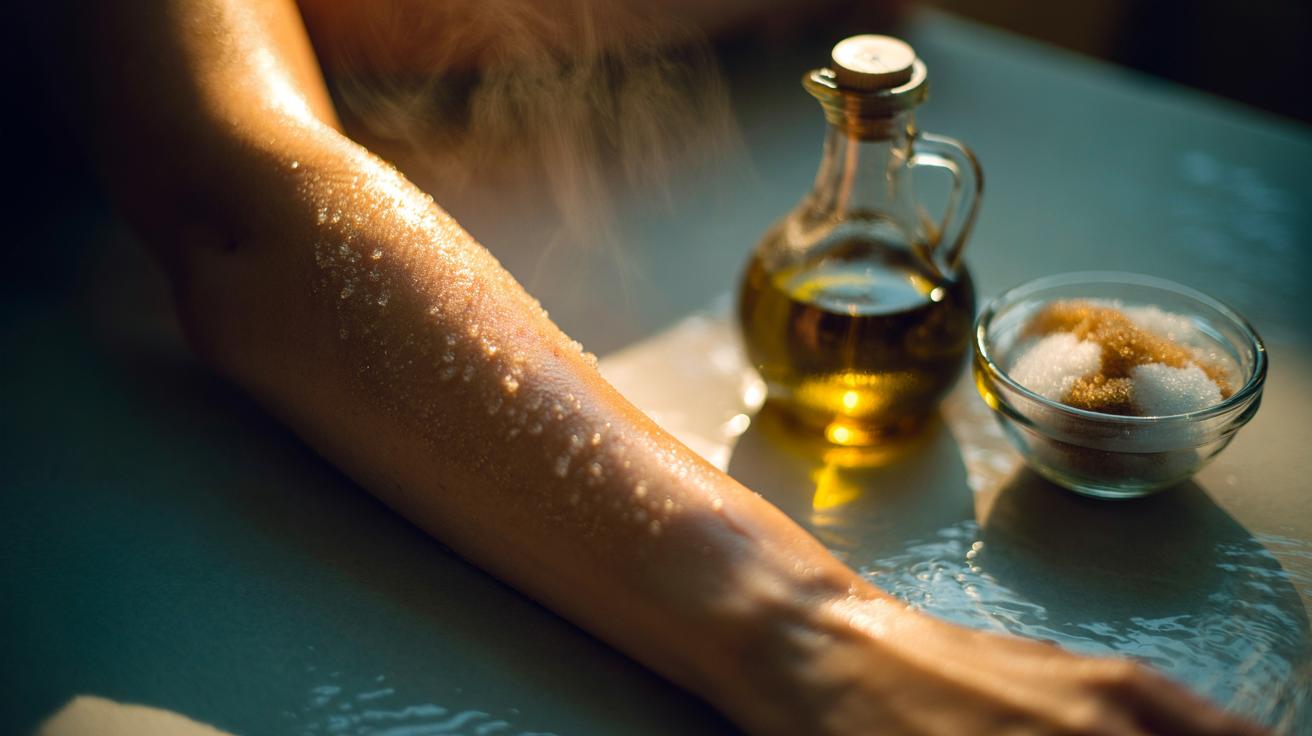
Beauty forums swear by a pantry fix for stubborn self-tan: a blend of olive oil and sugar. It sounds quaint, but there’s a grounded reason it works on patchy ankles, wrists, and the tell-tale collarbone tide line. Self-tan pigments bind to the outermost layer of skin, so a method that softens and loosens that layer can nudge the colour away without harsh chemicals. The oil cushions the scrub, and the crystals provide targeted lift. Used with light pressure, this duo fades blotches without stripping your barrier. Here’s how it actually lifts colour, how to do it properly, and the pitfalls worth avoiding before you step into the shower.
Why Olive Oil and Sugar Dislodge Self-Tan
Self-tan relies on DHA reacting with amino acids in the stratum corneum, tinting dead skin cells at the surface. Sugar works as a precise physical exfoliant, nudging away those pigmented corneocytes. Its crystalline edges buff the surface so the brown cast releases evenly, rather than streaking. Olive oil acts as an emollient and light solvent. It seeps between cells, softening the “glue” that holds dead skin together and loosening cosmetic binders from mousse or lotion formulas. The combination targets surface pigment, not your living skin, which is why it can be both effective and gentle when used correctly.
Oil first, then abrasion, is the crucial sequence. The oil phase reduces friction, lowers the risk of microtears, and helps dissolve any waterproofing agents left from tan or body lotion. When you massage in sugar afterwards, you’re lifting softened, tinted cells rather than grinding them. That synergy is what turns a kitchen duo into a credible fake tan remover. Avoid scrubbing on broken, sunburnt, or freshly shaved skin, because any exfoliation there amplifies irritation and patchiness.
Step-by-Step Method for Even Colour Lift
Begin with a warm shower to hydrate and swell the outer layer of skin. Pat until damp, then smooth a generous film of olive oil over the areas you want to fade. Wait two to three minutes so it can soften stubborn patches like elbows and knees. Mix a paste of two parts sugar to one part oil in your palm; brown sugar brings a finer grain for delicate areas, while white sugar offers more bite on ankles. Use light, circular motions for 60–90 seconds per zone, keeping the skin slick rather than squeaky.
Rinse with lukewarm water and a small amount of gentle, sulphate-free cleanser to break the oil. Pat dry; don’t rub. Follow with a moisturiser rich in glycerin or urea to keep the fade even over the next 24 hours. If patches persist, repeat after 12–24 hours rather than scrubbing harder. One thorough session usually softens obvious streaks without compromising the skin barrier. For face and delicate areas, switch to brown sugar, reduce pressure, and halve the contact time.
| Step | Recommendation |
|---|---|
| Ratio | 2 parts sugar : 1 part olive oil |
| Granule size | Brown sugar (fine) for face; white sugar (regular) for body |
| Contact time | 60–90 seconds per area, light pressure |
| Frequency | Every 24 hours until even; avoid daily over-scrubbing |
| Aftercare | Moisturiser with glycerin/urea; re-tan only after skin is calm |
Safety, Skin Types, and Common Pitfalls
Not all skin tolerates oils equally. Olive oil can feel heavy on acne-prone skin and may be comedogenic for some; swap to jojoba or grapeseed oil if congestion is a concern. Skip this method on active eczema, psoriasis, open cuts, or sunburn. Sensitive complexions do better with a finer grain and shorter massages. Overzealous pressure is the classic mistake: it triggers redness, makes remaining colour look blotchier, and can compromise the barrier, leading to stingy showers and uneven future tans.
Mind the bathroom floor; oil makes surfaces slick. Lay a towel or use a non-slip mat, and wash residue away with hot water and detergent. Another pitfall is mixing this routine with strong acids or retinoids on the same day. If you use an AHA/BHA exfoliant elsewhere in your routine, give skin a 24-hour breather. Finally, be realistic: very fresh tans can lift quickly, but older, oxidised colour may need two gentle sessions. Patience outperforms pressure every time.
Comparisons with Store-Bought Tan Removers
Commercial removers often rely on alpha-hydroxy acids (such as glycolic or lactic), enzymes (papain), or urea to loosen tinted cells chemically. They can be fast and even, especially across large areas. The olive oil and sugar method is low-cost, fragrance-free if you choose, and available on demand. It’s primarily mechanical, so it avoids acid sting, but technique matters. Use the lightest effective pressure and keep skin well-lubricated to mimic the glide of a salon mitt.
For heavy build-up from weekly tanning, you might alternate methods: a mild AHA body wash one evening, then the oil-and-sugar polish the next day. For faces, dedicated removers or enzyme gels are often safer than grit. Exfoliating mitts pair well with oil as long as you keep the strokes short and gentle. Cost-wise, pantry ingredients win; time-wise, enzyme foams can edge ahead. The best choice hinges on your skin type, tolerance for fragrance/acids, and how quickly you need a reset.
This humble duo works because it respects skin architecture: soften the surface, then lift what’s ready to go. A simple routine, consistent pressure, and thoughtful aftercare are the difference between an elegant fade and a patchy undo. If you treat skin kindly, your next application of self-tan will glide on smoother and last longer. Keep a note of what ratio, grain, and timing gave you the cleanest result, and tweak for seasons or skin changes. When your colour needs a reset, which method suits your skin and schedule best—and why?
Did you like it?4.6/5 (29)